
Create a blog and publish your first post
Step-by-step setup of a new blog and your first article, from the editor toolbar to featured images, categories, authors, and publishing.
This article walks through the full path from an empty account to a published blog post: creating the blog itself, then writing, formatting, and publishing your first article.
Step 1: Create the blog
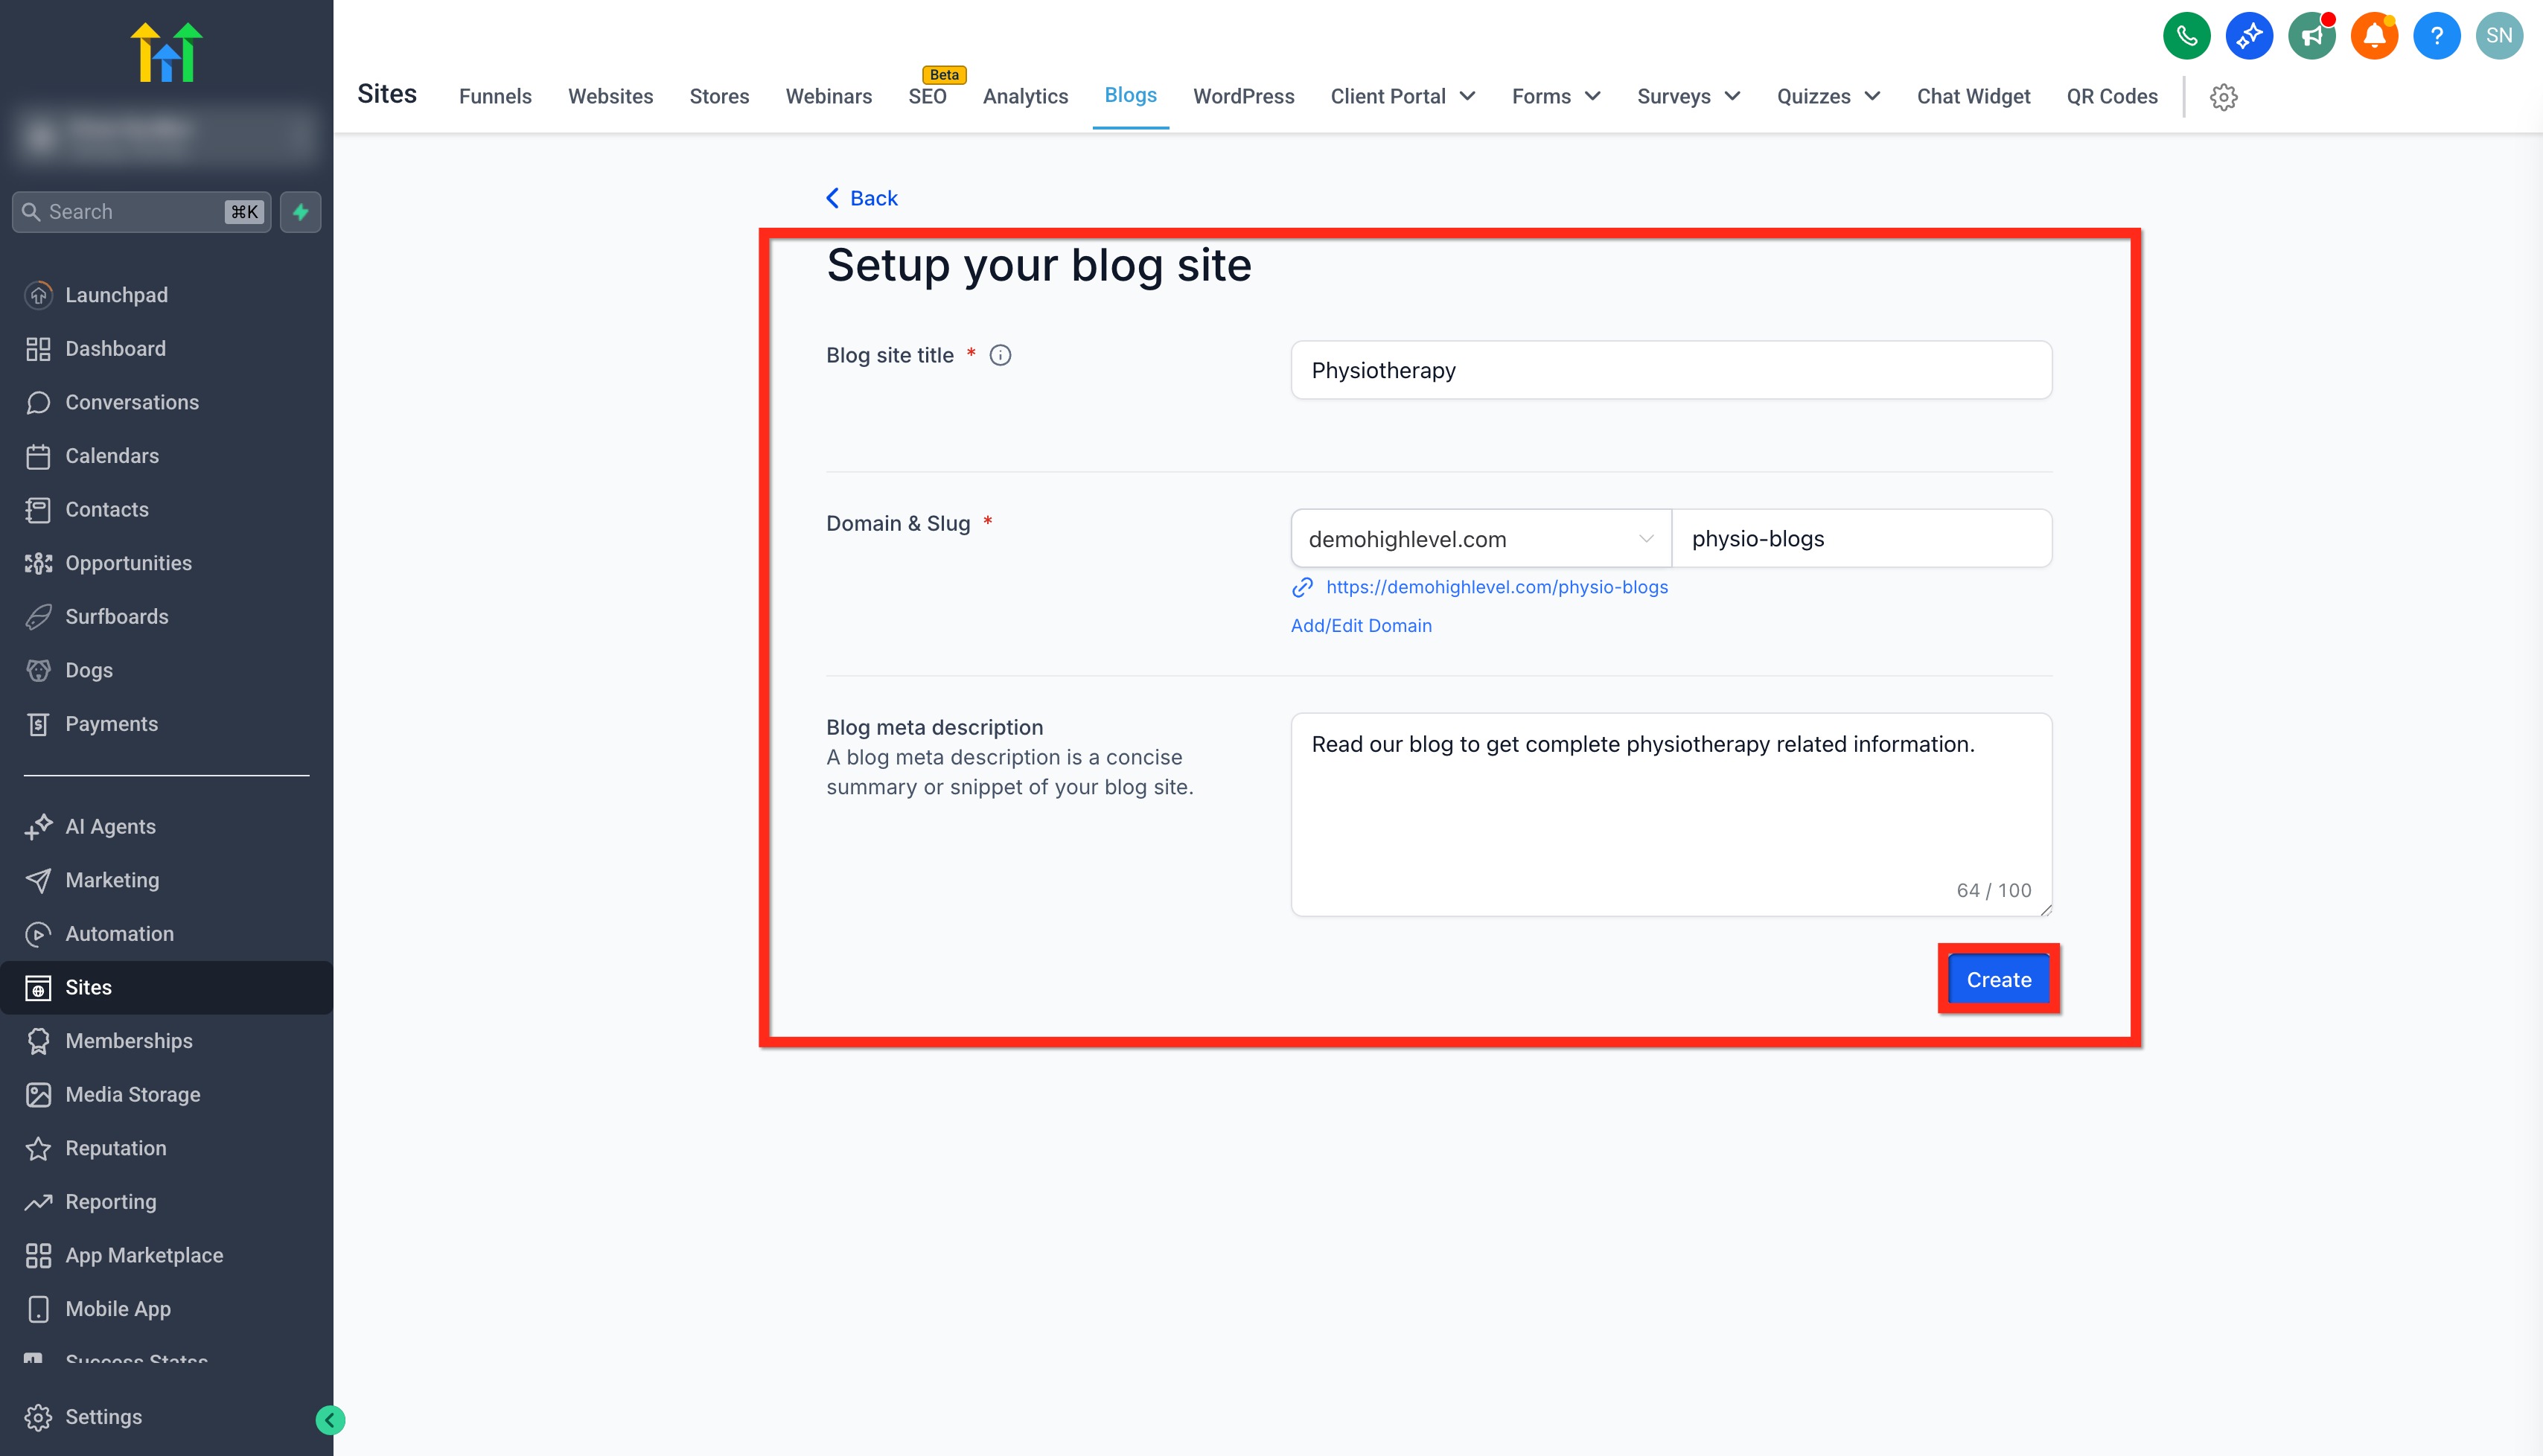
- Go to Sites > Blogs.
- Click Create Blog.
- Enter a Blog Title — this shows in browser tabs, search results, and RSS feeds, so make it something recognizable (e.g., "Acme Co. Blog" rather than "Blog 1").
- Choose or connect a Domain. You can skip this and add it later, but you won't be able to publish live until a domain is attached.
- Set the Slug — this is the path segment that follows your domain (commonly
/b/). - Add a Meta Description for the blog itself. This is recommended for SEO, since search engines sometimes use it to describe your blog as a whole.
- Save.
Tip: Keep the blog slug short and generic (like
borblog) since every post URL will include it. Changing it later changes every post's URL.
Step 2: Start a new post
- From inside your blog, click New Post.
- Choose how to start:
- From scratch — a blank editor.
- Import from URL — pull in an existing article by its web address.
- Import from CSV — bulk-add multiple posts at once (useful when migrating a large existing blog).
For your first post, start from scratch so you get familiar with the editor.
Step 3: Write and format the post
You land in the post editor with a title field and a formatting toolbar. A few things to know:
- Title: Write a clear, descriptive title. This becomes your default SEO title unless you override it later (see Blog post SEO).
- Auto-Save: Toggle Auto-Save on in the upper right, next to the Back button. With it on, your work saves continuously; without it, save manually and often.
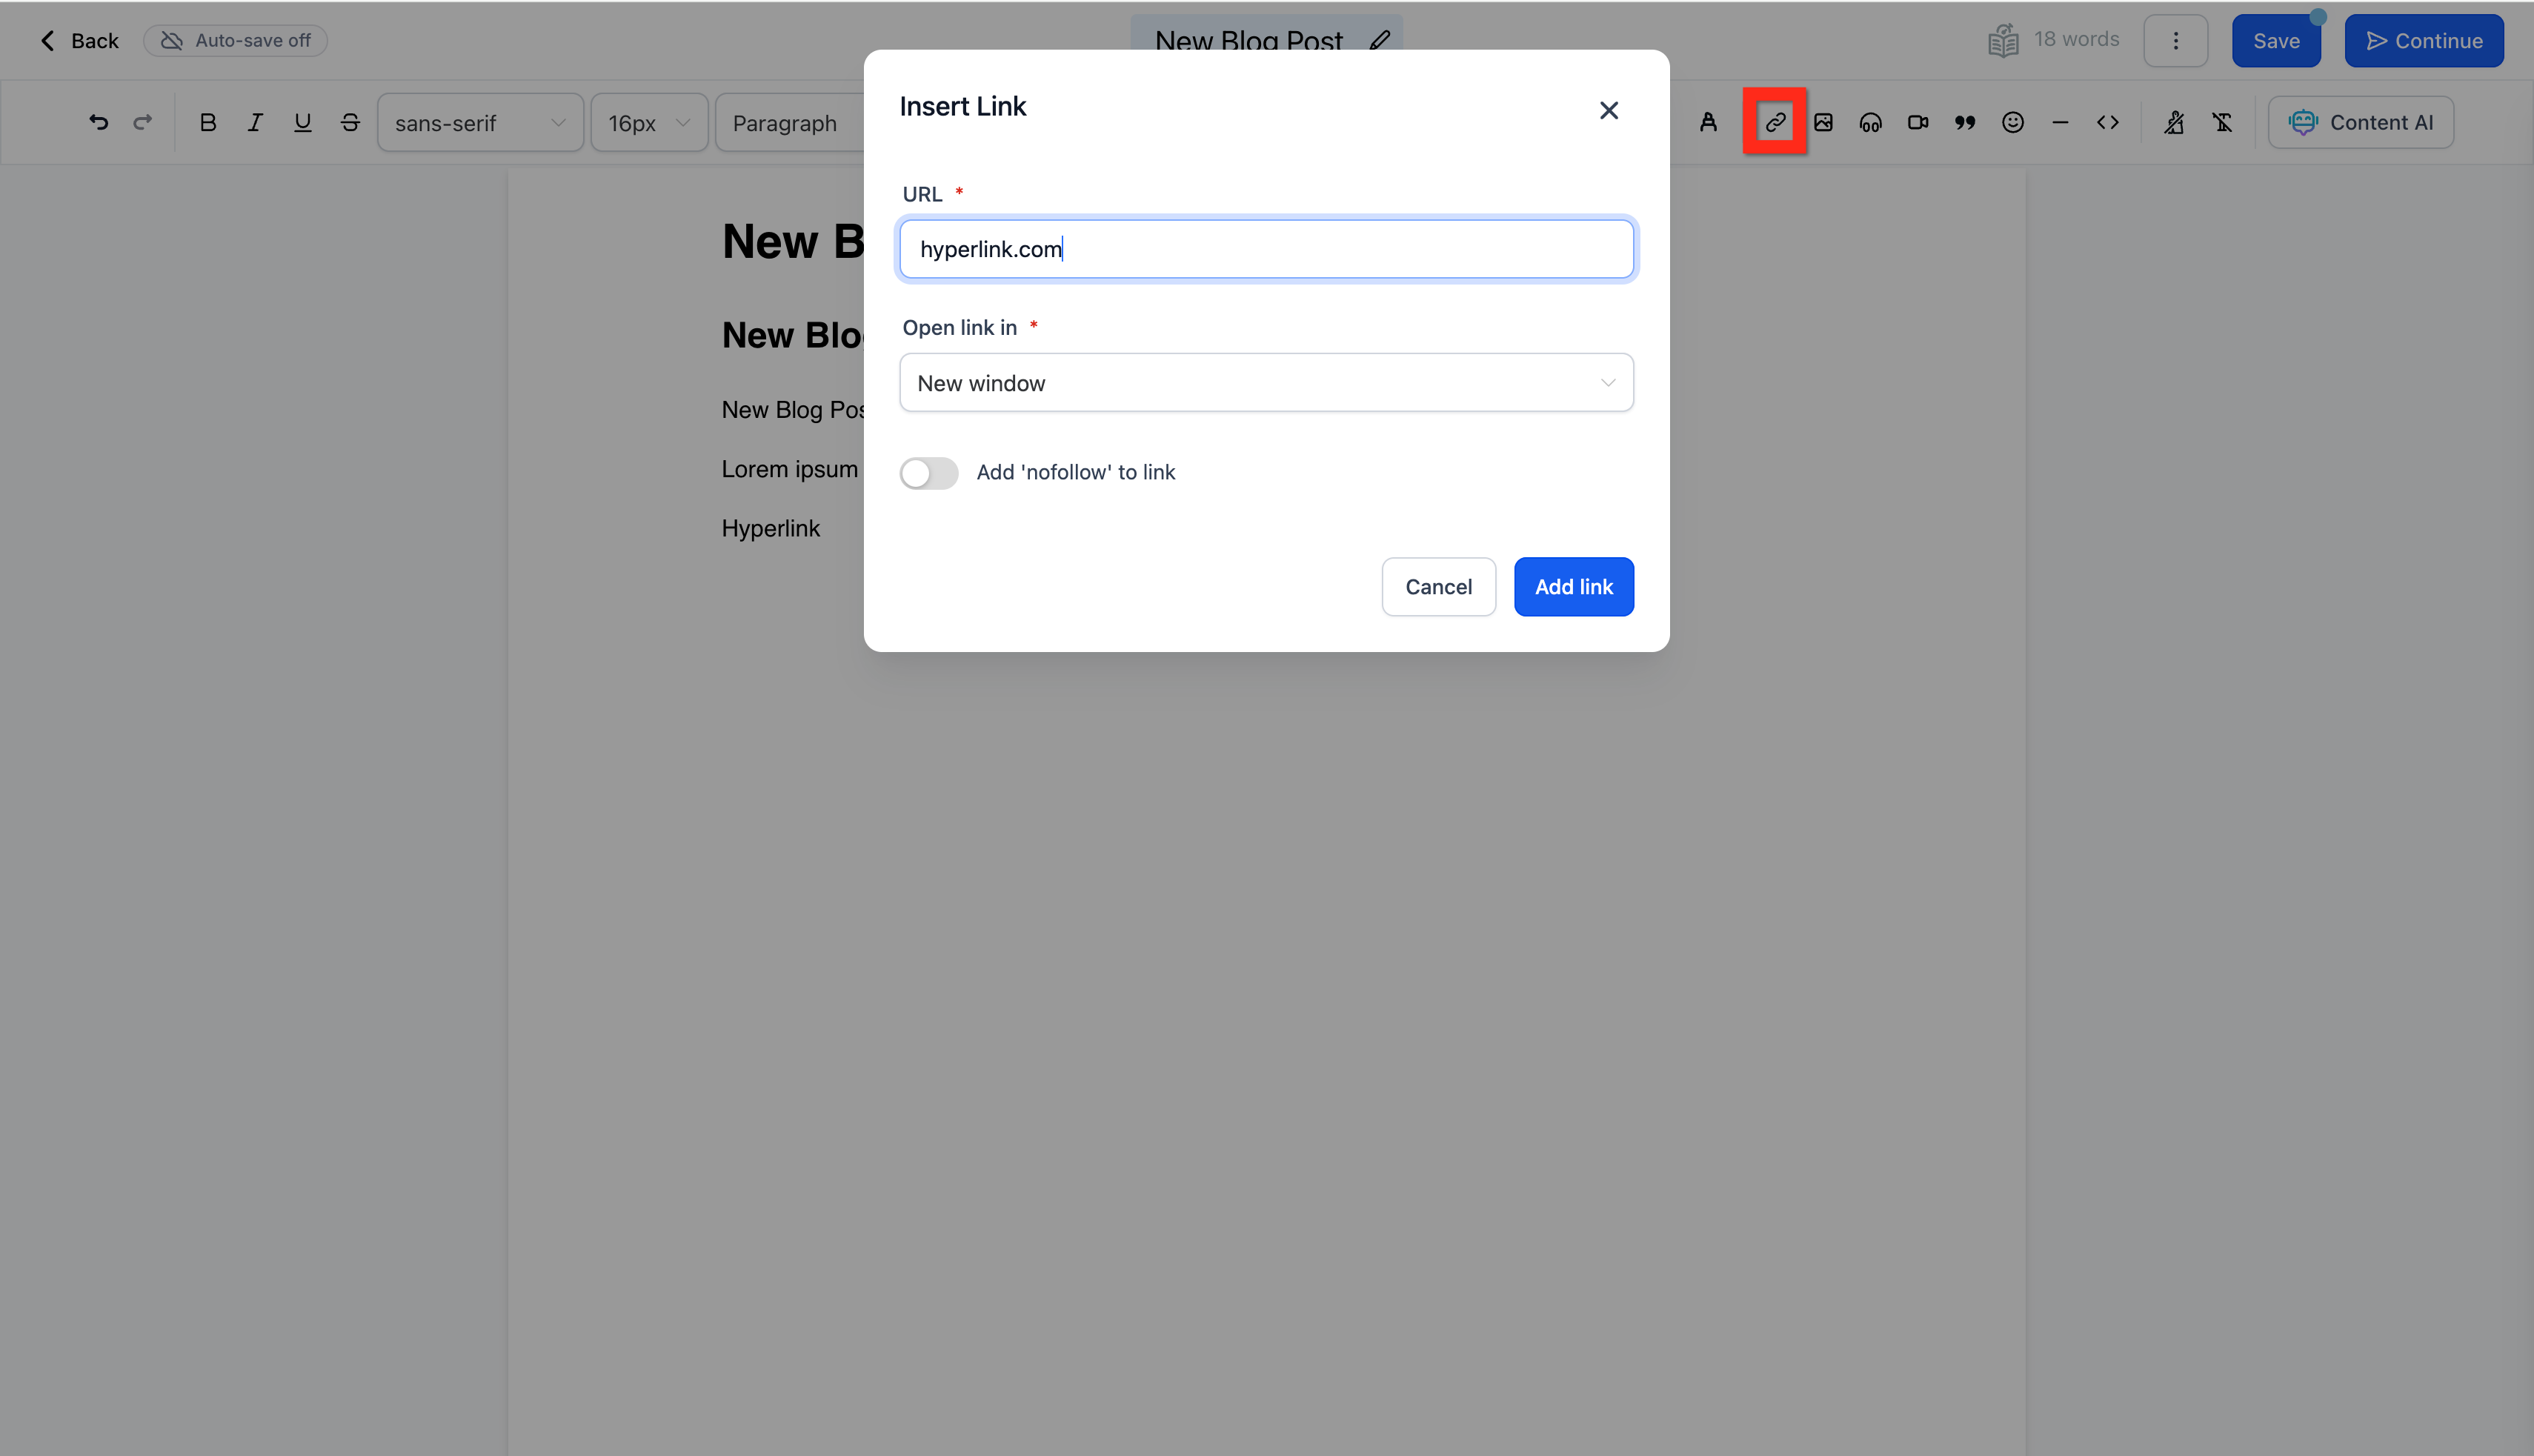
- Hyperlinks: Highlight text, click the chain/link icon in the toolbar, paste the URL, and confirm.
- Images: Click the cursor where you want an image, then click the image icon — you can insert from a URL, your Media Library, or generate one with the built-in image AI tool.
- Audio and video: Use the headphones icon for audio and the camera icon for video, both sourced from your Media Library or external platforms.
Note: The content area of the post editor is roughly 736px wide. Size images to that width (or a bit larger for retina displays) so they don't get stretched or cropped oddly.
Tip: If you're starting from a blank page and want a head start, the built-in writing assistant can generate an outline, introduction, or full draft for you. See Writing with the AI content assistant.
Step 4: Add post details
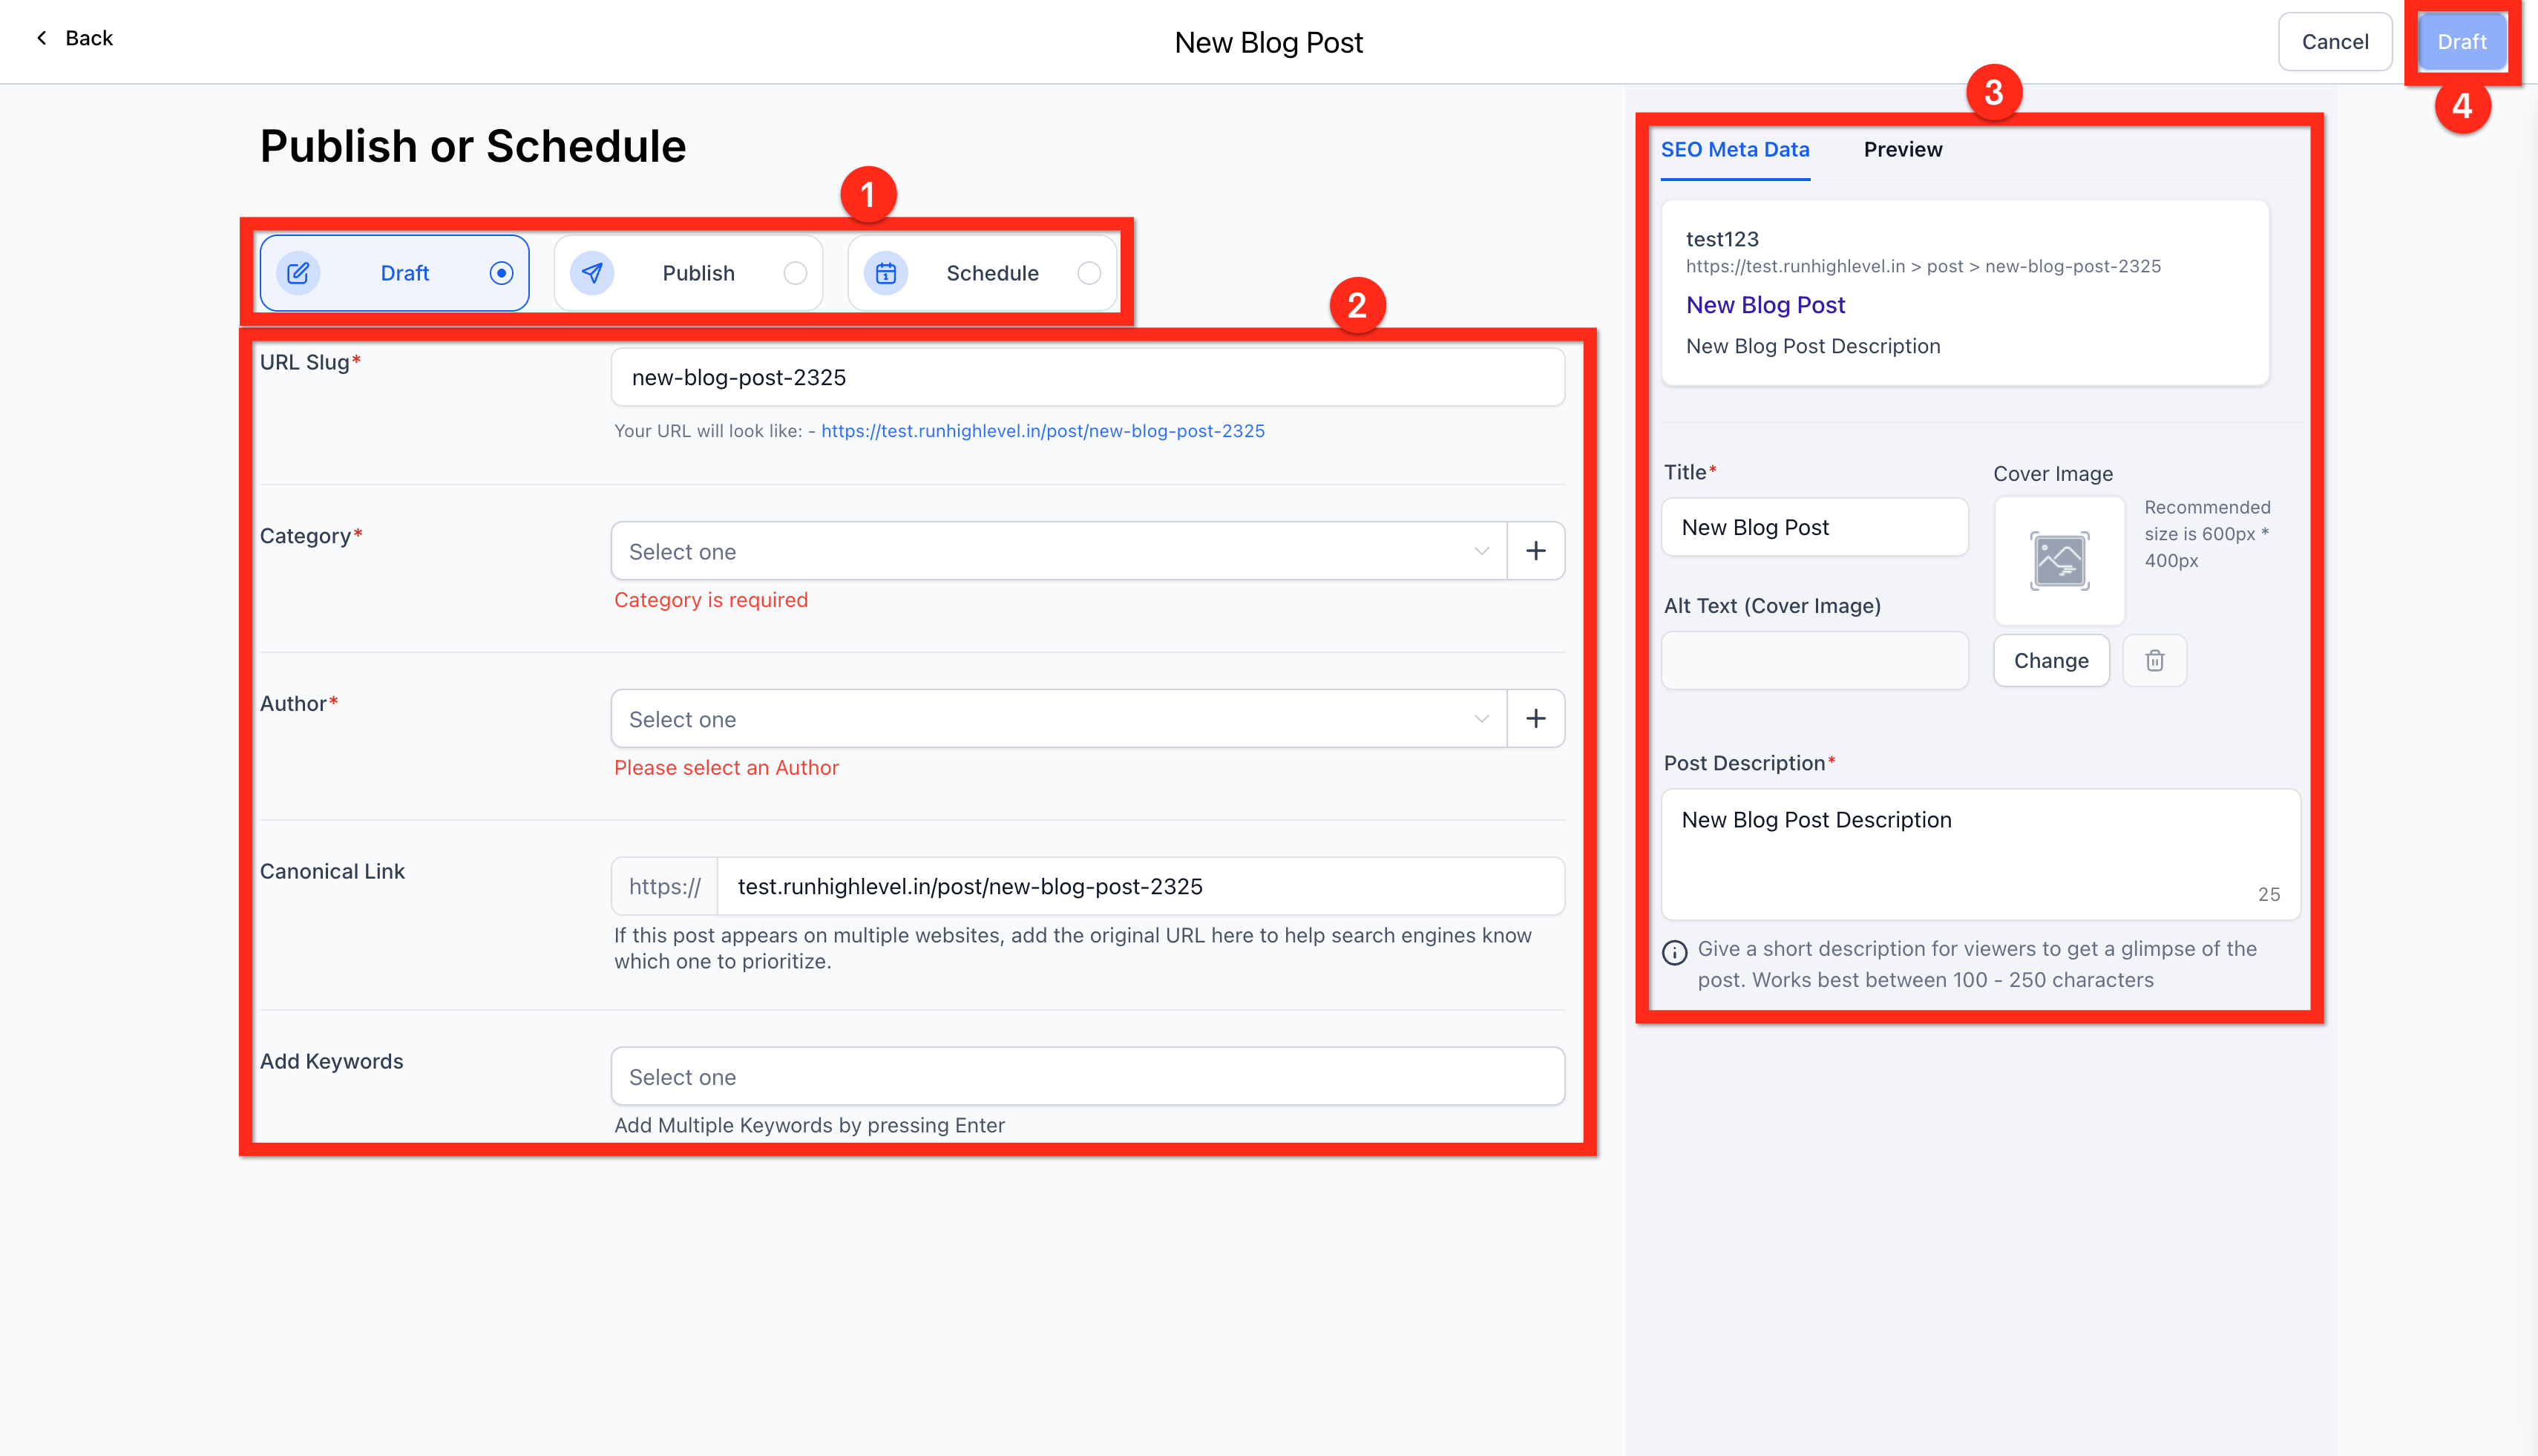
When your draft is ready, click Continue to move to the post details screen. This is where you set everything that controls how the post is organized, found, and displayed:
Required fields:
- URL slug — the unique path for this post (e.g.,
5-tips-for-better-onboarding). - Category — select an existing category or create a new one inline.
- Author — select an existing author or add a new one (see Categories, authors, and organizing your blog).
- Post title — carries over from your draft but can be edited here.
- Post description — a short summary used in listings and previews.
Optional but recommended:
- Keywords — helps with on-site search and internal organization.
- SEO title — override the display title search engines see, if different from your post title.
- Cover image — the featured image shown in blog lists and social shares. Add descriptive alt text for accessibility and SEO.
- Canonical link — defaults to the post's own URL; only change this if the same content is published elsewhere and you want search engines to credit the original.
Step 5: Publish, schedule, or save as a draft
At the bottom of the details screen, choose a status:
- Draft — saves your work without making it public. Good for content still in review.
- Publish — goes live immediately (or you can set a past date, useful when migrating older content).
- Schedule — pick a future date and time; the post automatically switches to Published at that moment.
Click the button matching your choice (it relabels itself — "Save Draft," "Publish," or "Schedule").
Warning: Publishing requires the blog to have a connected domain. If you try to publish before connecting one, you'll be prompted to add a domain first.
What "done" looks like
Your first post is live when:
- Its status shows Published (or Scheduled, if you set a future date) in the post list.
- Visiting the post's URL —
yourdomain.com/b/your-slug— shows the finished article. - The cover image, title, and description appear correctly when you preview it.
Use How to Preview Blog Post style checks before publishing: most editors offer a preview mode so you can see exactly how the post will render before it goes live.
Related articles
- Blogs overview: how blogging works on the platform
- Add a blog to a website or funnel
- Categories, authors, and organizing your blog
- Blog post SEO: titles, slugs, meta, and more
- Writing with the AI content assistant
Frequently asked questions
Can I edit a post after it's published?
Yes. You can go back into any published post and edit the content, images, or SEO fields. One exception: author details on a post generally can't be changed once that post has been published, so double-check the author selection before you publish.
What's the difference between "Publish" with a past date and just publishing now?
Setting a past publish date is mainly useful when migrating existing content — it lets the post's published date reflect when it was originally written, rather than the day you moved it into the platform. Functionally, it still goes live immediately either way.
Can I unpublish a post later?
Yes, you can switch a published post back to Draft at any time. It will immediately stop appearing on your live blog, in RSS feeds, and in sitemap listings.