
Create and publish a form
Build a Northgate quote form, configure its CRM source tag, and verify publication, embedding, and delivery.
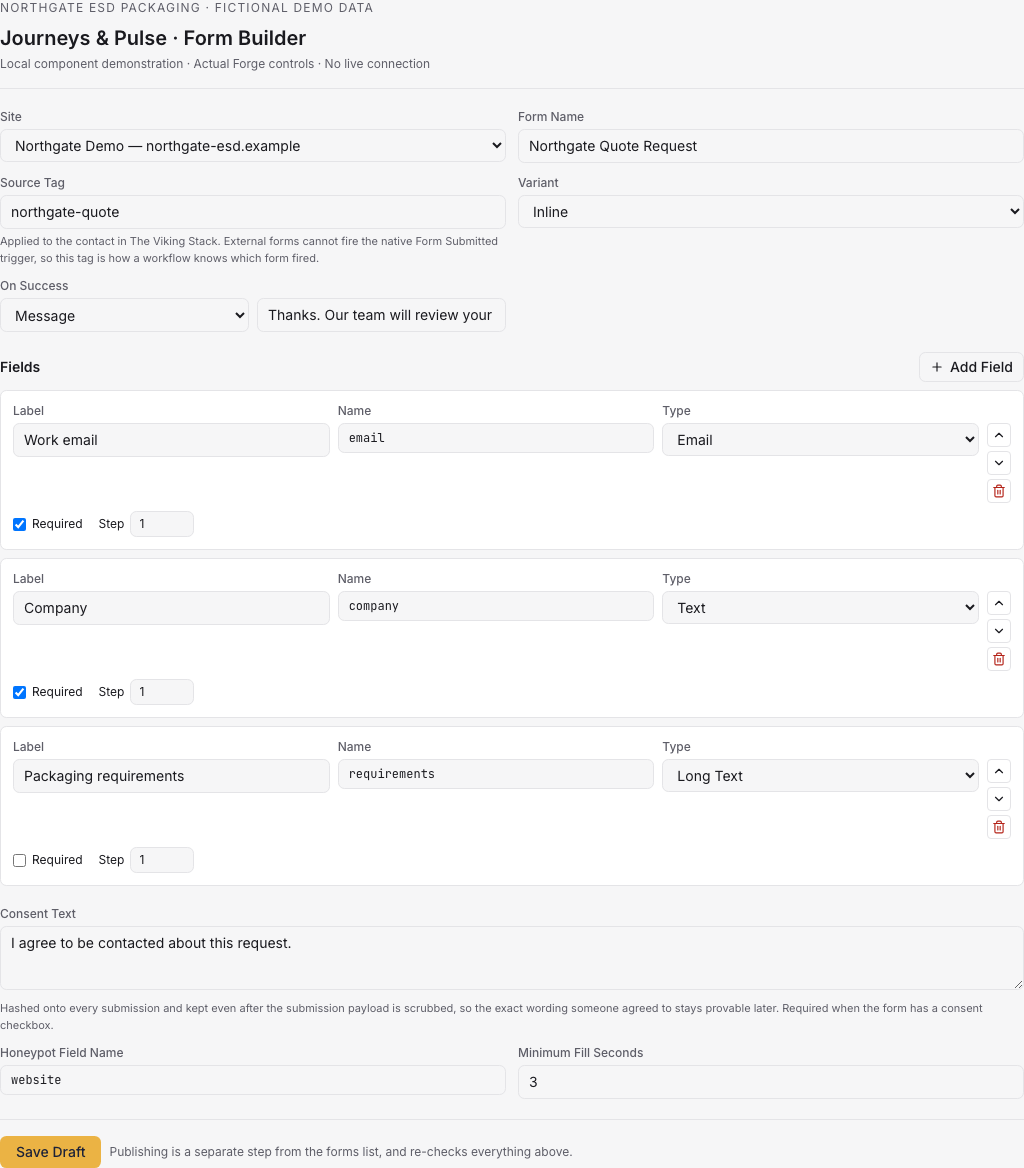
The form builder collects a buyer's request and connects the submission with their journey and CRM handoff. Build a Northgate ESD Packaging quote form with a few useful fields, then verify both the visitor experience and delivery.
Create the form
You need a tracked site in the selected account. If none exists, Forms directs you to add one under Settings first.
- Open Journeys & Pulse > Forms.
- Choose New Form.
- Select the correct Site and domain.
- Set Form Name to a recognizable name, such as “Northgate packaging quote.”
- Set Source Tag to a specific tag, such as
northgate-quote. - Choose Variant: Inline, Modal, or Popup Launcher.
- Configure On Success with a Message or Redirect.
Source Tag is applied to the CRM contact. External forms cannot fire the CRM's native Form Submitted trigger, so configure the intended CRM workflow around this tag. Agree on the tag with the person maintaining that workflow before publishing.
A form cannot move between sites after creation. Submissions are accepted only from its site's allowed domains, so confirm the domain now. Rebuild the form on the other site if you selected the wrong one.
Build the fields
- Keep the initial Email field; publishing requires an email field for contact matching.
- Choose Add Field for each additional question.
- Set its Label, stable Name, and Type.
- Mark Required only when the answer is necessary.
- Set Step when grouping a longer form into stages.
- Use Move Up or Move Down to arrange the questions.
For Northgate, add a Text field for company and a Long Text field for packaging requirements. A Number field can capture quantity. Keep the initial quote request short enough for a buyer who does not yet know every specification.
Labels are what visitors read; names identify fields downstream. Use unique names and preserve established names when editing a live form. For Dropdown, Multi-Select, or Radio Group fields, enter options one per line as value | Label. How Did You Hear About Us offers a separate attribution question.
Review consent and spam controls
Fill Consent Text when using a Consent Checkbox. The form preserves evidence of the wording associated with submissions. Use wording approved for your actual process.
Choose a Honeypot Field Name that does not match any real field. A collision could cause legitimate answers to be treated as spam. Minimum Fill Seconds sets the minimum completion time; keep it realistic for the form's length.
Read the builder's publishing blockers, including missing email, duplicate names, consent wording, or a honeypot collision. A draft save does not establish that these checks passed.
Save, publish, and embed
- Choose Save Draft to save the new form and return to the list.
- Choose Publish on its row after review.
- Confirm Published status or resolve the displayed error.
- Expand the row and copy its Mount element.
- Follow Embedding A Form to load the embed script once per page.
- Place the mount element where the form should appear.
Note: On an already published form, Save Draft updates the existing definition while retaining published status. It does not create a separate unpublished revision. Use Unpublish first if you need an offline editing period.
Test on the intended allowed domain with a clearly identified demo submission. Check required fields, success behavior, and the CRM source tag. Then inspect delivery in Signals: a visitor-facing success message alone does not prove the CRM handoff completed.